
How to Replace a Bike Chain Safely at Home
A chain rarely fails without warning. Shifting becomes hesitant, the drivetrain sounds rougher than usual, or the chain begins to skip under power. If “how to replace bike chain” is what brought you here, the job is well within reach for many riders - provided you buy the correct chain and set its length properly.
A new chain is not simply a way to make pedalling feel smoother. Replacing a worn chain at the right time helps protect the cassette and chainrings, which are considerably more expensive to replace. On an e-bike, where motor torque loads the drivetrain much more than a manual bike, it can make an even bigger difference.
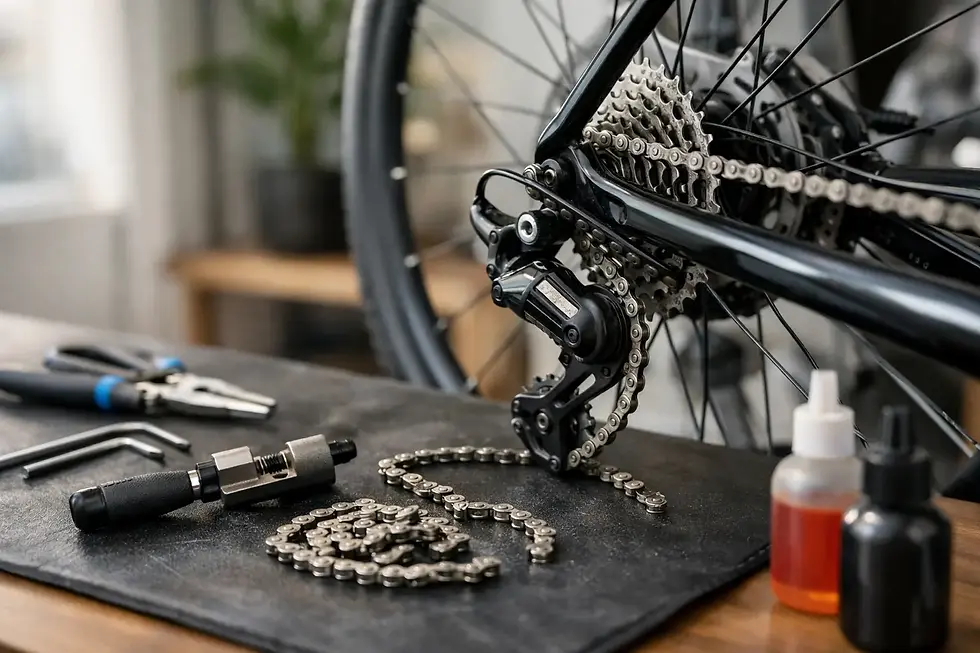
Before you replace a bike chain, check that it is worn
Do not replace a chain just because it looks dirty or is noisy. Cleaning and lubricating may solve those problems. What matters is wear, often called chain stretch, although the side plates do not actually stretch. The pins and rollers wear over time, increasing the effective length of the chain.
The most accurate way to check is with a chain-wear gauge. For most modern derailleur bikes, a reading of 0.5% is the point to start planning a replacement. At 0.75%, replacement is normally due. Eleven- and twelve-speed chains should generally be changed earlier than older, wider chains because their tolerances are tighter.
If you do not have a gauge, look for poor shifting, a chain that rides up the teeth under load, or pronounced shark-fin-shaped cassette teeth. These signs can mean the chain has worn long enough to damage the rest of the drivetrain. A fresh chain fitted to a badly worn cassette may slip, particularly in the smaller sprockets. In that case, the cassette may need replacing too.
Buy the correct replacement chain
The number of sprockets on the rear cassette determines the chain you need. Count them rather than relying on the number printed on the shifter, especially if the bike has had parts changed over the years. A 9-speed chain is not interchangeable with an 11-speed chain, and using the wrong width can cause poor shifting or premature wear.
Match the chain to the drivetrain manufacturer where possible. Shimano, SRAM and Campagnolo systems each have design differences, particularly on modern 11- and 12-speed groupsets. Some chains are directional, while others have a specific outer plate that must face away from the bike. The instructions supplied with the chain are worth reading before fitting it.
For e-bikes, choose a chain rated for e-bike use if the manufacturer recommends one. This is particularly sensible on Bosch, Shimano Steps and Yamaha-equipped bikes used for commuting, hills or regular cargo loads. The chain itself may look ordinary, but it deals with repeated high-torque loading that can accelerate wear.
You will need a chain tool if the chain uses a joining pin or if you need to shorten it. Most current chains use a quick link, sometimes called a master link. Quick-link pliers make fitting and removal easier, although a careful rider can often close a new link by applying the rear brake and pressing down firmly on a pedal. Always check whether the quick link is single-use. Many are designed to be fitted once only.
How to replace a bike chain step by step
First, shift the chain onto the smallest rear sprocket and the smallest front chainring. This reduces tension and makes removal straightforward. If the bike has a quick link, locate it and use quick-link pliers to separate it. With a joining pin chain, use the chain tool to push out a pin. Avoid pushing the pin completely free unless your new chain includes a suitable replacement joining method.
Lay the old and new chains next to each other on a clean bench or floor. Keep both chains straight and under light tension, then match the length link for link. This is usually the safest method when the old chain was correctly sized and the bike’s gearing has not changed. Cut the new chain to the same length with the chain tool.
There is one important exception: do not copy the old chain’s length if it was clearly too short, too long, or has been fitted incorrectly. If you are unsure, use the manufacturer’s sizing method. For a typical double or single chainring derailleur bike, route the new chain around the largest front chainring and largest rear sprocket without passing it through the rear derailleur. Pull the ends together, then add the amount of extra length specified for the drivetrain, commonly two full links. Exact requirements vary, so follow the chain or drivetrain instructions where available.
Next, route the new chain through the rear derailleur. This is where many home installations go wrong. The chain must pass around both jockey wheels and through the derailleur cage correctly, usually behind the small guide tab between the two wheels. If it runs on the wrong side of that tab, the chain can appear fitted but shifting will be poor and the drivetrain may make a clicking noise.
Join the chain with the supplied quick link or approved joining pin. Directional quick links need to be fitted in the stated direction, generally with the arrow moving forwards at the top run of the chain. Turn the pedals slowly by hand and check that the link moves freely through the derailleur and around the cassette.
Check the gears before your first ride
With the bike supported securely, pedal by hand and shift across the cassette one sprocket at a time. The chain should climb and drop cleanly without trying to move two sprockets at once. A slight adjustment to cable tension may be needed if the old chain was very worn, but do not immediately adjust derailleur limit screws unless the chain is trying to shift off either end of the cassette.
Then take a short, gentle test ride. Use moderate pedal pressure first, especially in the gears you use most often. If the new chain skips under load, stop riding hard. The likely cause is a worn cassette or chainring rather than a fault with the new chain. Continuing to force it can damage the new chain and leave you without reliable drive.
On an e-bike, test with the assistance switched to a lower mode before trying full power. Do not shift under maximum pedal force or while the motor is delivering its strongest assistance. Briefly easing off the pedals during a shift is kinder to the chain, cassette and derailleur, and it is particularly worthwhile on steep Eastbourne-area climbs or loaded commuter journeys.
Common mistakes that shorten chain life
The most common error is fitting a chain that is too long or too short. A chain that is too long can leave the derailleur unable to maintain tension, causing chain slap and unreliable shifting. One that is too short can overstretch the rear derailleur if the bike is accidentally shifted into the largest chainring and largest sprocket, potentially damaging the derailleur hanger or frame.
Another mistake is mixing a new chain with a heavily worn cassette and hoping it will bed in. It will not. The old sprocket teeth have worn to match the elongated old chain, so the new chain may climb and slip under load.
Finally, avoid over-lubricating. Apply a small amount of suitable chain lubricant to the rollers, turn the pedals to distribute it, then wipe off the excess from the outside plates. Wet, gritty lubricant attracts road dirt and acts like grinding paste on the drivetrain.
How often should a bike chain be replaced?
Mileage varies widely. A fair-weather leisure bike may get several thousand miles from a chain, while a year-round commuter bike can wear one out far sooner. Wet roads, grit, frequent climbing, rider power and e-bike assistance all affect the result. Checking with a wear gauge every few weeks is more useful than relying on a mileage target.
Can I replace only the chain?
Yes, if it is changed early enough. This is exactly why regular checking saves money. If the chain has been run well beyond its wear limit and the new one skips, expect the cassette to need replacement. A worn chainring may also need attention, although chainrings often last longer than cassettes.
When is it better to use a workshop?
A workshop is the sensible choice if the chain keeps skipping after replacement, the derailleur is bent, the cassette is worn, or the bike has an unfamiliar drivetrain. It is also worth getting help with high-value e-bikes where correct drivetrain setup matters to reliability and safe use. Eastbourne Cycles can check chain wear, cassette condition and shifting together, rather than replacing parts by guesswork.
A correctly fitted chain should run quietly, shift cleanly and give you confidence when you put the power down. Check it regularly, keep it clean, and replace it before it turns a routine service item into a full drivetrain bill.


Comments