
Tubeless tyre maintenance: a practical guide for cyclists
- Karl Cowell
- 2 days ago
- 8 min read

Tubeless tyre maintenance is the routine care required to keep a tubeless system airtight and puncture-resistant by managing sealant levels, rim tape integrity, and tyre cleanliness. Unlike tubed setups, tubeless tyres rely on liquid sealant to self-seal small punctures automatically, which makes that sealant a consumable that needs regular attention. Neglect it and you risk slow air loss, failed seals, and mid-ride flats that could have been avoided. Tubeless systems deliver real advantages in puncture protection, rolling resistance, and grip, particularly on rough terrain, but those benefits only hold when the system is properly maintained.
What is tubeless tyre maintenance and why does it matter?
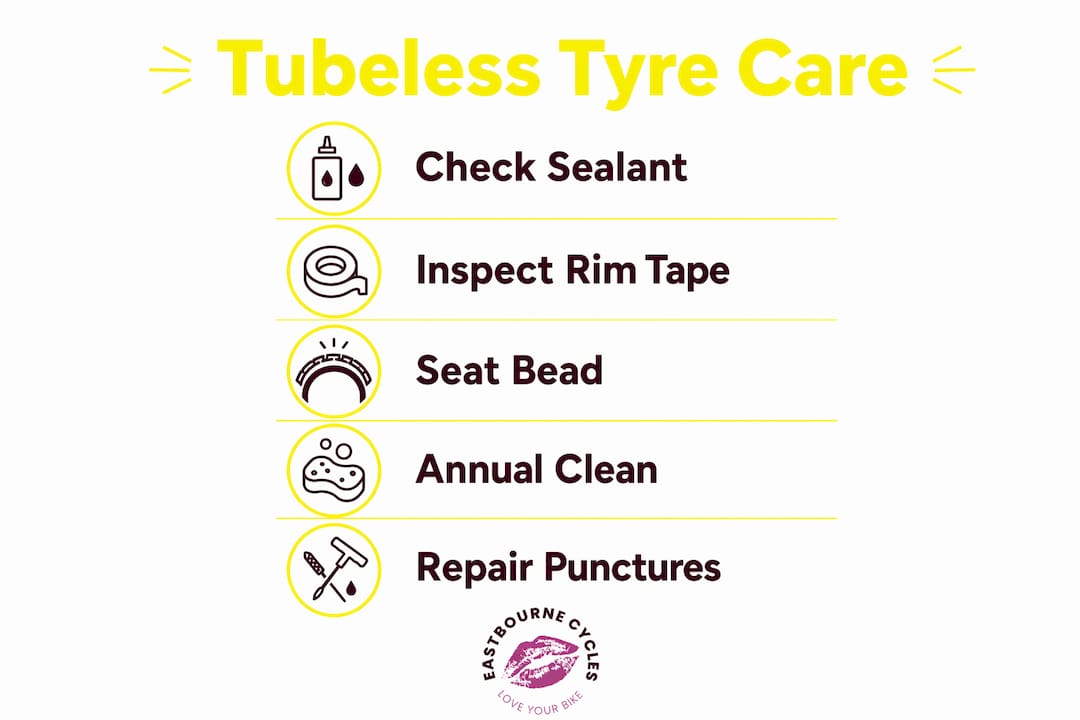
Tubeless tyre maintenance covers three core tasks: monitoring and topping up sealant, inspecting rim tape, and performing periodic full tyre cleanouts. Each task targets a different failure point in the system. Sealant degrades over time, rim tape can peel or crack, and dried sealant builds up inside the tyre and adds rotational weight. Letting any one of these slide affects the whole system’s reliability.
The sealant is the heart of the tubeless setup. It circulates inside the tyre and plugs small punctures within seconds of impact. Without sufficient fresh sealant, that self-sealing ability disappears entirely. For e-bike riders, where tyre loads are higher due to motor-assisted speeds and heavier frames, keeping sealant in good condition is especially critical.
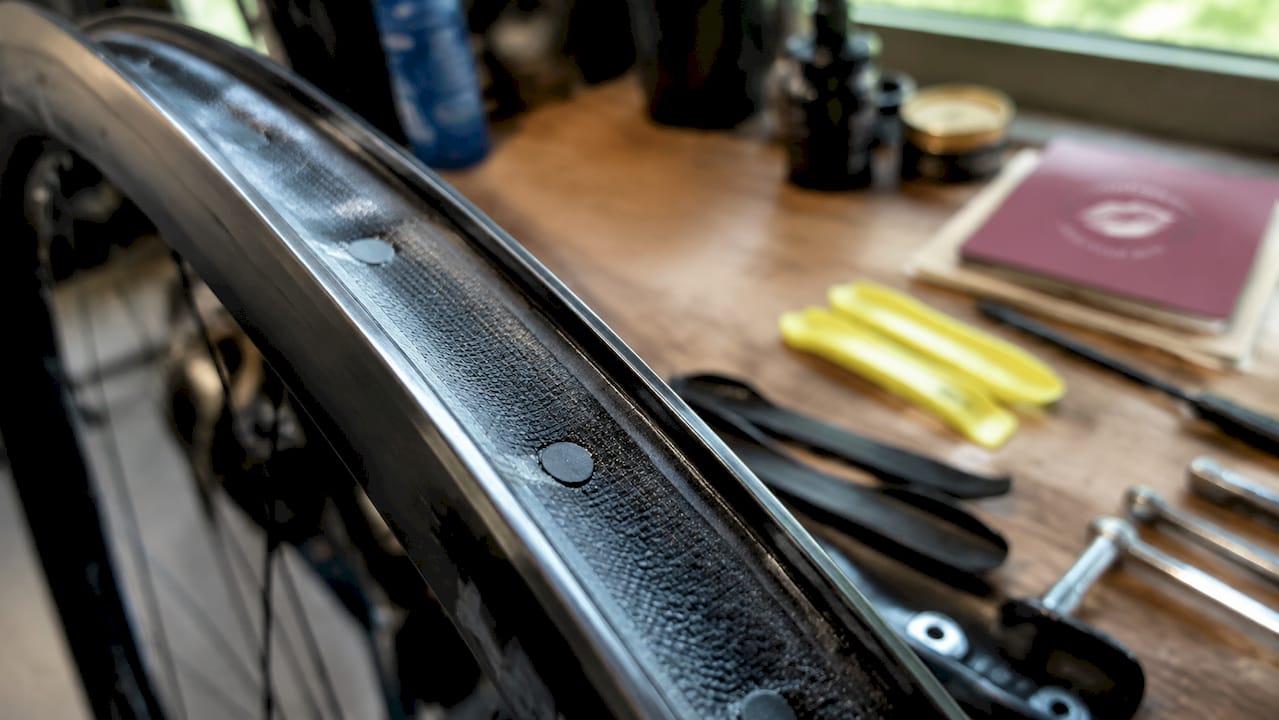
Rim tape is the second pillar. It seals the spoke holes in the rim and creates the airtight chamber the system depends on. A single small tear or lifted edge can cause persistent air loss that no amount of sealant will fix. Checking rim tape as part of your regular maintenance routine prevents that frustration.
How often should you check and top up tubeless sealant?
Check sealant at least every 1–3 months, with monthly checks as the safest default. Monthly checks catch degraded sealant before it causes problems. In hot or dry climates, sealant evaporates faster, so checking more frequently is the right call.
Most sealants last between two and six months depending on conditions. Dry, warm weather accelerates evaporation significantly. That range means a sealant that lasts six months in a cool, wet British winter may dry out in three months during a hot summer.
Signs that your sealant needs attention
Watery consistency when you shake the tyre and hear liquid sloshing. This means the solids have separated and the sealant is losing effectiveness.
Clumping or dried chunks inside the tyre. You can feel these when you squeeze the sidewall or hear them rattling.
Slow air loss overnight that is not explained by a visible puncture. This often means sealant is too depleted to plug sidewall pores.
Tyre feels heavier than usual. Dried sealant accumulates and adds rotational weight, affecting ride feel.
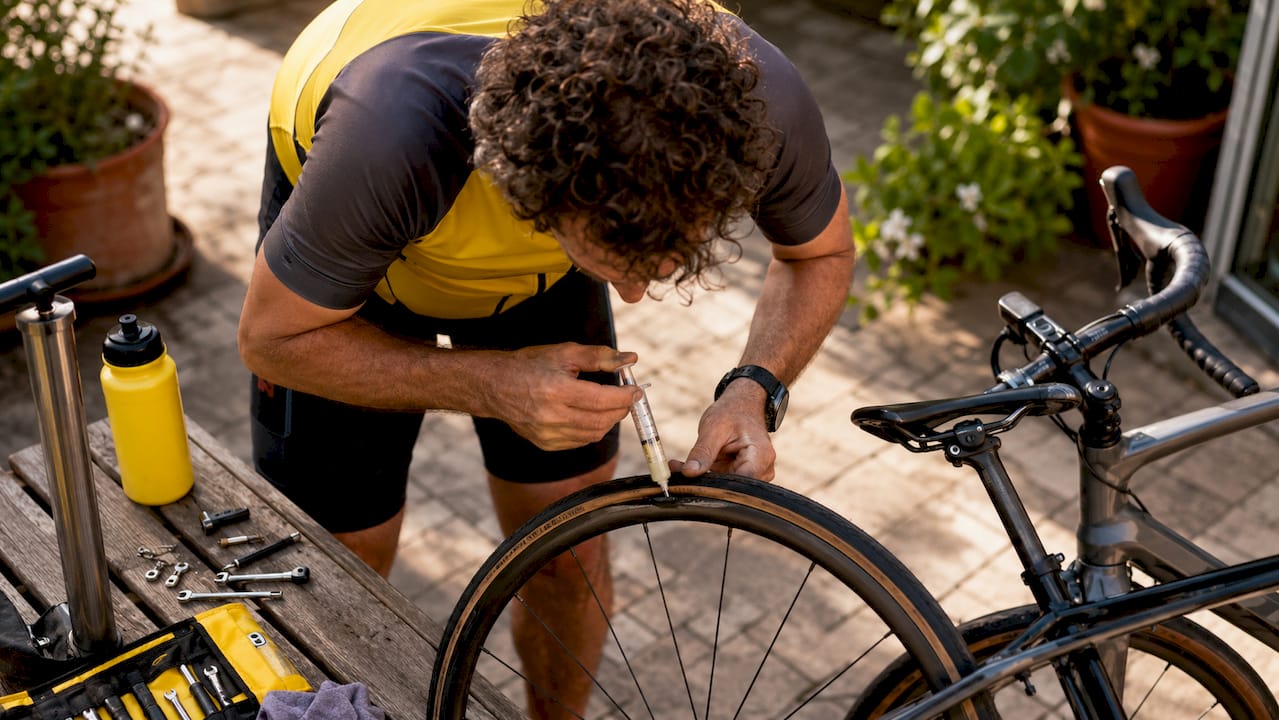
To check sealant without fully removing the tyre, rotate the wheel so the valve is at the bottom, remove the valve core, and insert a thin dipstick or a length of wire to gauge the fluid level. If the sealant looks watery or the level is low, top it up through the valve using a syringe or dedicated sealant injector. You do not need to dismount the tyre for a routine top-up.
Pro Tip: Treat sealant checks like chain lubrication. Set a reminder on your phone for the first of each month. A small top-up takes five minutes and costs very little. It is the cheapest insurance you have against a flat tyre.
What other key maintenance tasks does a tubeless tyre need?
Beyond sealant, three other tasks keep a tubeless system performing reliably: rim tape inspection, bead seating checks, and annual full tyre cleanouts.
Rim tape inspection and replacement
Damaged or poorly installed rim tape causes persistent air leaks that sealant cannot fix. If your tyre needs inflating very frequently despite adequate sealant levels, rim tape failure is the likely cause. Inspect the tape by removing the tyre and running your finger along the full width of the rim bed. Look for:
Lifted edges or bubbles along the tape surface
Tears or punctures near spoke holes
Tape that has shifted off-centre, exposing spoke holes
Residue or moisture trapped beneath the tape
Replace rim tape if you find any of these issues. Use tape rated specifically for tubeless systems and apply it with firm, even pressure to avoid air pockets. Overlap the ends by at least 50mm and re-check the valve hole alignment before reinstalling the tyre.
Bead seating and inflation
A properly seated bead is non-negotiable for an airtight tubeless system. A floor pump or compressor is recommended to seat tubeless tyre beads fully during installation. A standard track pump often lacks the burst of air volume needed to pop the bead into place. If the bead is not fully seated, the tyre will lose air continuously regardless of sealant levels.
Annual full tyre cleanout
Perform a complete tyre clean and fresh setup at least once every 12 months. Annual cleanouts remove dried sealant clumps that increase wheel weight and reduce puncture protection. Sealant can clump inside tyres over time, adding rotational weight and blocking the fresh sealant from reaching new punctures. To do a full cleanout, dismount the tyre, remove all dried sealant residue from the tyre casing and rim bed, inspect the rim tape, and reinstall with fresh sealant.
Pro Tip: If you are losing air slowly and cannot identify the cause, check the valve core before anything else. A loose or corroded valve core is a common culprit and takes thirty seconds to tighten or replace.
How does tubeless sealant work and what are its limits?
Tubeless sealant is a water-based liquid containing latex and suspended solids such as fibres or particles. When a puncture occurs, air pressure forces sealant into the hole. The latex and solids combine to plug the gap within seconds. The process is automatic and requires no rider intervention for small punctures.
Sealant self-seals punctures typically up to 6mm in diameter. That covers the vast majority of trail debris, thorns, and small flints. Larger cuts, sidewall tears, or impacts that cause a sudden blowout exceed what sealant can handle.
When sealant is not enough
Punctures larger than 6mm require a tubeless plug inserted directly into the hole.
Sidewall cuts are difficult to seal with sealant alone because the tyre flexes with every rotation, reopening the wound.
Sudden blowouts from sharp impacts may require fitting an inner tube at the roadside.
Multiple punctures in quick succession can deplete sealant faster than it can seal, leaving the tyre unable to hold pressure.
For roadside repairs, carry a tubeless plug kit and a CO2 inflator or small pump. Tubeless plug insertion requires firm, deliberate pressure to seat the plug properly. A hesitant or shallow insertion will not seal the hole. Push the plug in fully, then trim the excess flush with the tyre surface.
A spare inner tube remains a sensible backup for longer rides. If the tyre is beyond field repair, fitting a tube gets you home without waiting for assistance.
What troubleshooting steps help diagnose tubeless tyre air loss?
Air loss in a tubeless tyre has several distinct causes, and identifying the right one saves time and avoids unnecessary work.
Sidewall weeping is a frequent cause of overnight pressure loss. Tyre casings are porous at a microscopic level, and sealant plugs those pores continuously. When sealant is depleted, air seeps through the sidewall slowly. Topping up sealant and riding briefly to redistribute it usually resolves this within a day or two.
Symptom | Likely cause | Fix |
Slow overnight pressure loss | Sidewall weeping or low sealant | Top up sealant and ride to redistribute |
Rapid deflation after inflation | Rim tape failure or unseated bead | Inspect rim tape and reseat bead |
Air loss at valve area | Loose or damaged valve core | Tighten or replace valve core |
Persistent loss despite fresh sealant | Puncture larger than 6mm | Insert tubeless plug or fit inner tube |
Tyre will not hold air at all | Bead not seated | Use compressor or floor pump to reseat |
Diagnostic steps for persistent air loss
Inflate the tyre and submerge the wheel in water to locate bubbles. This pinpoints the exact leak source quickly.
Check the valve core with a valve core tool. A loose core is easy to miss visually but causes steady air loss.
Inspect the rim tape by removing the tyre and looking for damage near spoke holes.
Shake the tyre and listen for sloshing. No sound means sealant is dried out and needs replacing.
Pro Tip: Carry a small bottle of soapy water on longer rides. Applying it around the valve and bead area shows bubbles instantly, helping you diagnose a leak without submerging the wheel.
For e-bike riders, check the e-bike servicing guide for broader maintenance advice that covers tubeless tyre upkeep alongside motor and battery care.
Key takeaways
Tubeless tyre maintenance requires consistent sealant checks, rim tape inspections, and annual full cleanouts to keep the system airtight and puncture-resistant.
Point | Details |
Monthly sealant checks | Check sealant every 1–3 months; monthly is safest, especially in warm or dry conditions. |
Annual full cleanout | Dismount and clean the tyre completely once a year to remove dried sealant build-up. |
Rim tape is critical | Damaged or lifted rim tape causes persistent air loss that sealant cannot resolve. |
Sealant seals up to 6mm | Larger punctures need a tubeless plug or inner tube; carry both on longer rides. |
Diagnose before replacing | Use soapy water or submersion to identify the exact leak source before dismounting. |
What I have learned from years of tubeless maintenance
The biggest mistake I see cyclists make is treating tubeless as a set-and-forget system. They set it up, ride for six months, and then wonder why they are losing air every week. Sealant management requires consistent attention, the same way chain lube does. The difference is that a dry chain is obvious. Depleted sealant is invisible until you get a flat you could have prevented.
The second thing I have noticed is that riders often blame the tyre when the real problem is the rim tape. A tyre that needs inflating every couple of days almost always has a rim tape issue. It is a five-minute inspection that most people skip because it requires removing the tyre. Do not skip it.
For e-bike riders specifically, the higher tyre loads and speeds mean sealant depletes faster than on a standard road or gravel bike. I would recommend checking sealant every four to six weeks if you are riding an e-bike regularly, rather than waiting the full three months. The standard service at Eastbournecycles includes a sealant check, which is a good way to stay on top of it without doing everything yourself.
The honest truth about tubeless is that the system rewards riders who stay proactive. A monthly five-minute check prevents the majority of problems. Annual cleanouts prevent the rest. If you build those two habits, tubeless tyres are genuinely low-maintenance and highly reliable.
— Guy
Tubeless tyre servicing at Eastbournecycles
Keeping on top of tubeless tyre maintenance yourself is absolutely achievable, and the guidance above covers the core tasks. There are times, though, when a professional eye makes a real difference, particularly when persistent air loss resists straightforward fixes or when a full tyre rebuild is overdue.
Eastbournecycles offers expert bike repairs in Eastbourne covering tubeless sealant application, rim tape replacement, bead seating, and complete tyre strip and rebuild services. The team has over 12 years of experience and holds direct relationships with manufacturers including Shimano, Bosch, and Yamaha, meaning e-bike owners get specialist knowledge alongside standard tyre work. With a 4.7-star Google rating, you can book a service with confidence that your tubeless system will leave the workshop in proper working order.
FAQ
How often should I replace tubeless sealant?
Check sealant every 1–3 months and replace it when it appears watery, clumpy, or insufficient. Monthly checks are the safest default, especially in warmer months.
Can tubeless sealant seal any puncture?
Sealant seals punctures up to around 6mm in diameter automatically. Larger cuts, sidewall tears, or blowouts require a tubeless plug or an inner tube.
Why does my tubeless tyre keep losing air overnight?
Sidewall weeping is the most common cause of overnight pressure loss. Topping up sealant and riding briefly to redistribute it usually resolves the issue within a day or two.
How do I know if my rim tape needs replacing?
If your tyre loses air persistently despite adequate sealant, rim tape failure is likely. Remove the tyre and inspect the tape for lifted edges, tears, or exposed spoke holes.
Do e-bike riders need to maintain tubeless tyres differently?
E-bike tyres carry higher loads and operate at greater speeds, which depletes sealant faster. Check sealant every four to six weeks rather than the standard three months, and consider a professional e-bike service to keep the full system in check.
Recommended

Comments